When working with the computer, sometimes you may need to change user account type between the administrator and standard user. Windows 10 provides you with four different methods to change user account type, check out this post for details.
- Method 1: from Control Panel
- Method 2: from PC Settings
- Method 3: via User Accounts properties
- Method 4: with Command Prompt
Method 1: Change user account type from Control Panel
Step 1: Open Control Panel in Windows 10, and then click the “Change account type” link under “User Accounts”.

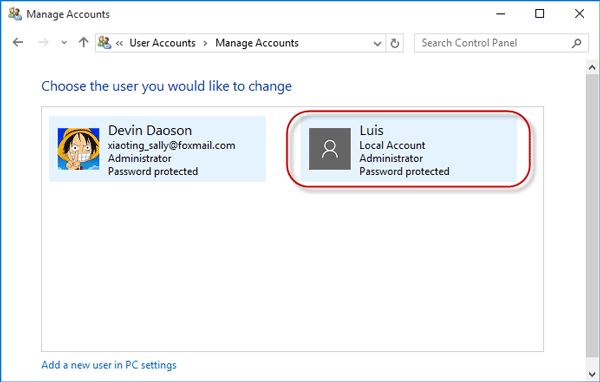
Step 2: Choose the user whose account type you would like to change.
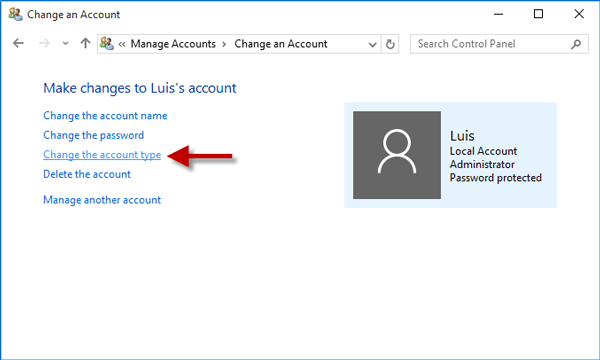
Step 3: Click the “Change the account type” link on the left side.
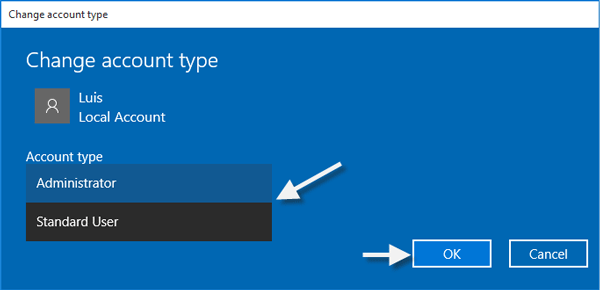
Step 4: Choose a new account type for your selected user, and then click the “Change Account Type” button. That’s it.

Method 2: Change user account type from Settings
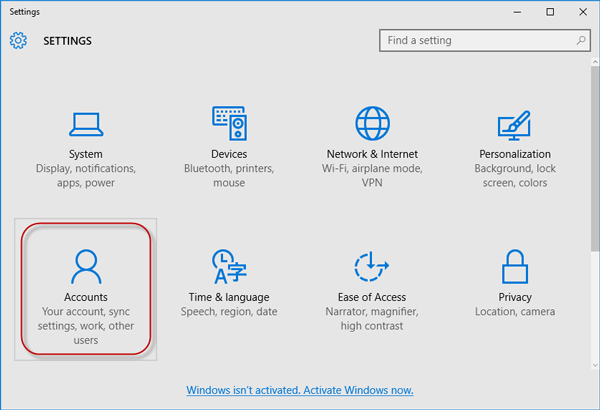
Step 1: Open the Settings app by pressing Win + I, and then click Accounts (Your account, sync settings, work, other users).
Step 2: On the Accounts page, click Family & other users on the left side. Locate the “Other users” section on the right side, click the user you want to change, and click the “Change account type” button.

Step 3: After the Change account type dialog opens, select your desired account type from the drop-down button, and click OK.
Method 3: Change user account type from User Accounts Properties
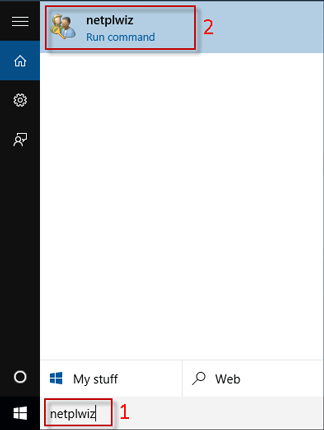
Step 1: Open the User Accounts dialog by typing netplwiz in Start menu search box.
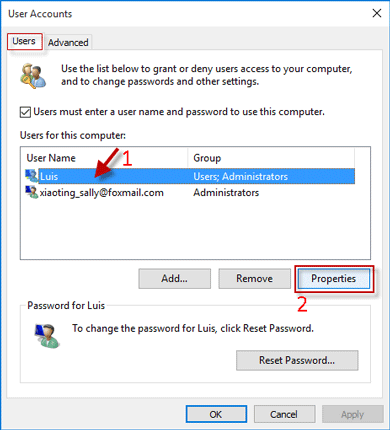
Step 2: On the User Accounts dialog, with the Users tab selected, click the user you would like to change, and then click the Properties button.
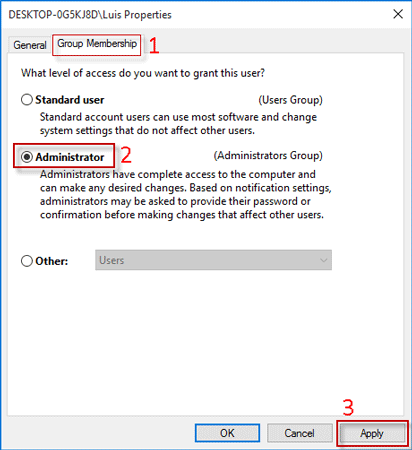
Step 3: After the Properties dialog opens, select the Group Membership tab, select the account type you want to grant this user, and then click Apply followed by OK.
Method 4: Change user account type with Command Prompt
Step 1: Open a Command Prompt window as administrator by pressing Win + X and then selecting “Command Prompt (Admin)”.
Step 2: Change the user account type with commands.
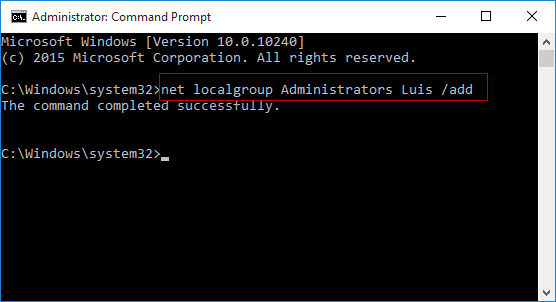
- To change a standard user to Administrator, you just need to add it to the Administrators group by executing the command: net localgroup Administrators Luis /add, as shown in the figure below. Replace with your username.
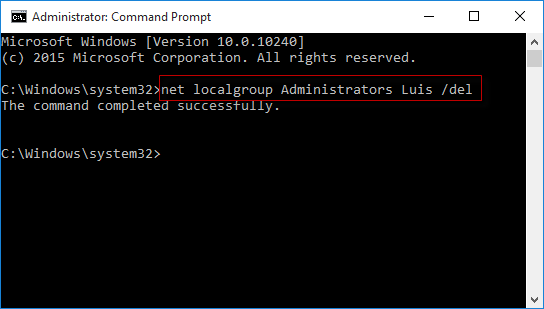
- To change an Administrator account to a standard user, you just need to remove it from the Administrators group by executing the command: net localgroup Administrators Luis /del, as shown in the figure below. Replace Luis with your username.
Tips: If you have several administrator accounts on your Windows 10, you can’t change all of them to standard users. You must have at least one administrator account on your PC. If you accidentally change all administrator account to standard users, you will lose admin account on Windows 10 and can’t be able to perform actions that require admin-level rights.

