
Is your PC running slowly? Performing a system diagnostic can help identify those hard-to-check hardware problems. This post will teach you how to perform a diagnostic startup in the Windows operating system in order to boot in a clean environment for troubleshooting a problem.
Step 1: Open the System Configuration tool.
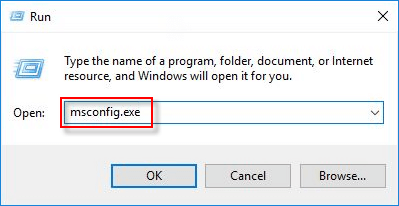
1. Press Win + R keys to open the Run dialog box, type in msconfig.exe, and click OK.
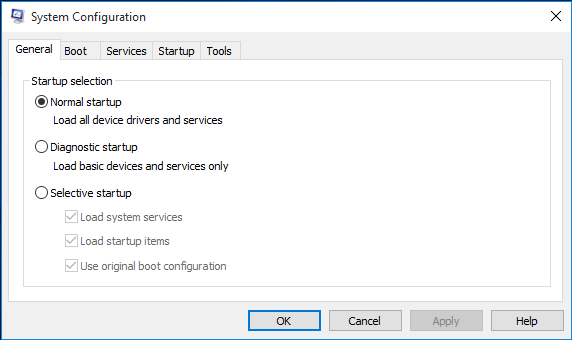
2. On the General tab, you can see three Startup options, the normal startup option is the Windows default. This option enables Windows to start in normal mode together with all programs, services, and device drivers loaded.
Step 2: To enable Diagnostic Startup mode.
Click on the Diagnostic Startup option, then click on Apply.
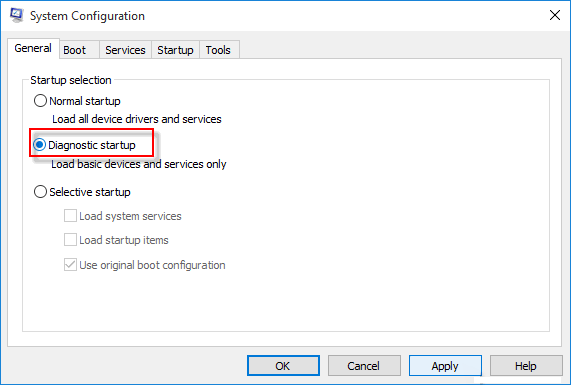
Tips: The diagnostic startup option enables Windows to determine which basic device drivers and software to load when you start Windows. When you use this option, the system temporarily disables Microsoft services such as the following services:
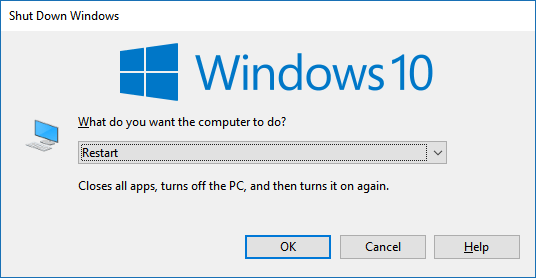
Step 3: When you are done, restart your PC to make this change take effect.
To put the computer back to a normal startup, open up MSCONFIG again and click "Normal startup" under the General tab, click OK and then Restart.
 How to Manage Startup Programs in Windows 10
 How to Disable Startup Programs for Windows PC
 How to Turn on/off Fast Startup in Windows 10
 3 Ways to Run a Startup Repair to Fix Windows Startup Problem
 How to Cancel Check Disk (Chkdsk.exe) Run at Startup
 How to Disable OneDrive AutoRuns at Startup in Windows 10