
Two-factor authentication is designed to improve the security of your Apple ID and all the personal information you store with Apple. Here will show you how to set up two-factor authentication for your Apple ID.
Two-factor authentication is available to iCloud users with device running iOS 9 or later. You can follow the steps below to turn on two-factor authentication for iPhone/iPad.
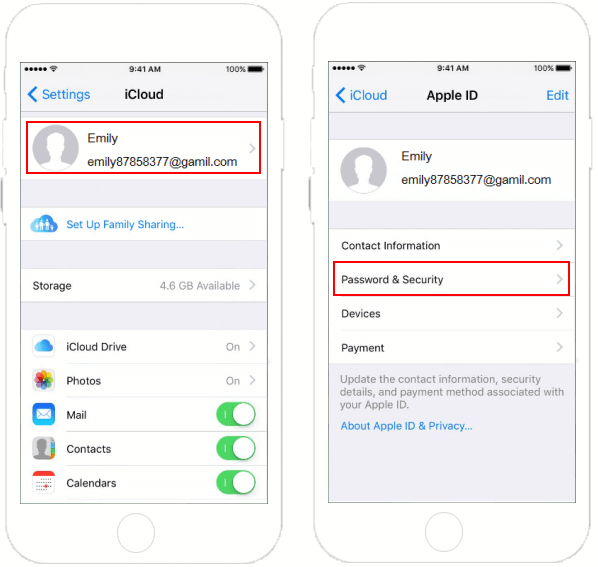
Step 1: Go to Settings > iCloud. Tap your Apple ID.
Step 2: Tap Password & Security.
Step 3: Tap on Setup Two-Factor Authentication.
Step 4: Tap on Continue.

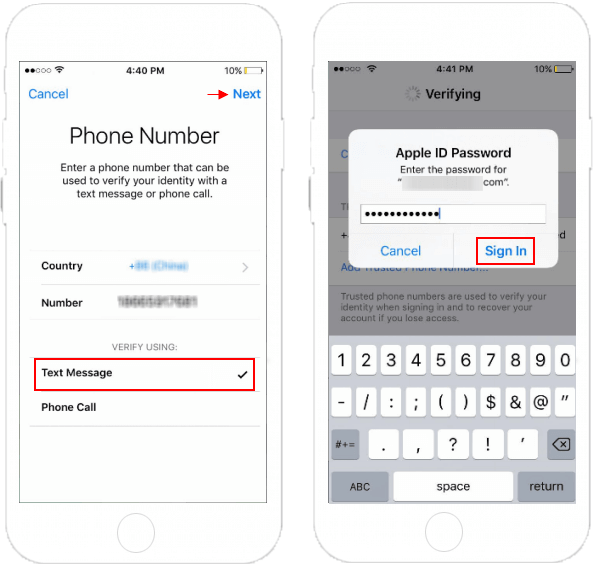
Step 5: Choose between Text Message and Phone Call for verification. Tap Next at the top right.
Step 6: Enter the password for Apple ID, then tap Sign In.
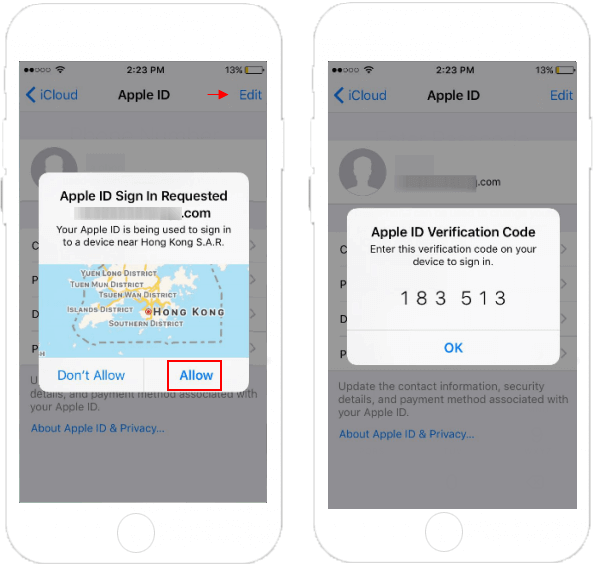
After done, two-factor authentication is enabled. When you sign in with Apple ID on a new browser, or another iPhone or Mac, you'll get a sign in the requested notification on the trusted device. At that time, tap Allow to receive your verification code, then use that code to complete sign in.
You can also set up two-factor authentication for Apple ID on Mac.
Step 1: On Mac, go to Apple menu > System Preferences.
Step 2: Click on iCloud > Account Details.
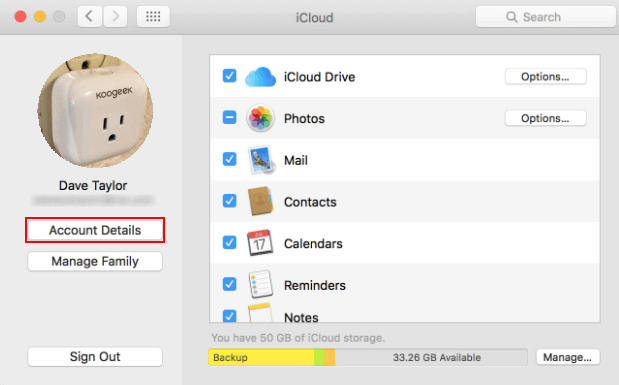
Step 3: Click the Security tab.
Step 4: Click Turn on Two-Factor Authentication.
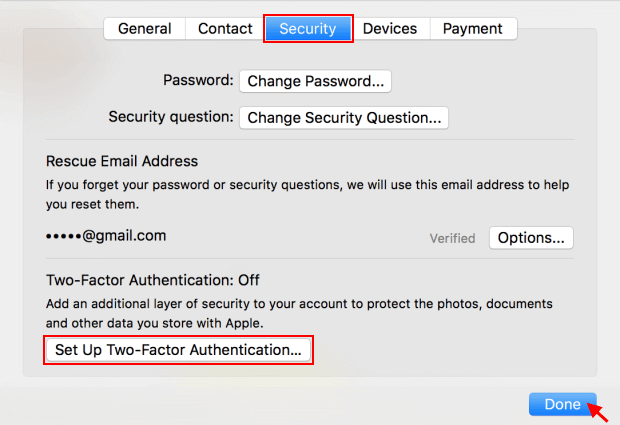
Step 5: When finished, click Done.
With two-factor authentication enabled, you'll verify your identity by entering both your Apple ID password and a six-digit verification code each time you sign in with the Apple ID account.
 How to Turn off Two-factor Authentication for Apple ID
 Reset Password for Apple ID with Two-factor Authentication
 3 Ways to Remove Apple ID from iPhone without Password
 How to Unlock an Apple ID That is Locked for Security Reasons
 How to Change Trusted Phone Number for Apple ID Using 2FA
 2 Ways to Turn off iPhone Backup Encryption without Password